
Left image (1200 pixels wide).

Right image (1200 pixels wide).
It is always a good idea to rectify the stereo pair before attempting to create depth maps. I use er9b (or er9c if er9b is too aggressive) to do so mainly because it also outputs the min and max disparities, which are usually needed by the automatic depth map generators. You can use StereoPhoto Makers to align but you will have to use df2 to manually get the min and max disparities.

Left image after rectification by er9b.

Right image after rectification by er9b.
Output from er9b (there's a whole lot more verbose from er9b but that's the important bit):
Mean vertical disparity error = 0.367249
Min disp = -21 Max disp = 16
Min disp = -23 Max disp = 15
Don't worry about the white areas in the left and right images as they will be cropped out after the depth map is obtained. They result from the camera rotations needed to align the stereo pair.
I am gonna use dmag6 to get the depth map using the min and max disparities coming from er9b. I could have used dmag5 with very similar results. We are only gonna consider the left depth map (associated with the left image) even though dmag6 outputs the left and right depth maps.
Input to dmag6:
min disparity for image 1 = -23
max disparity for image 1 = 16
disparity map for image 1 = depthmap_l.png
disparity map for image 2 = depthmap_r.png
occluded pixel map for image 1 = occmap_l.png
occluded pixel map for image 2 = occmap_r.png
alpha = 0.9
truncation (color) = 30
truncation (gradient) = 10
truncation (discontinuity) = 10000
iteration number = 5
level number = 5
data cost weight = 0.5
disparity tolerance = 0
radius to smooth occlusions = 9
sigma_space = 9
sigma_color = 25.5
downsampling factor = 1

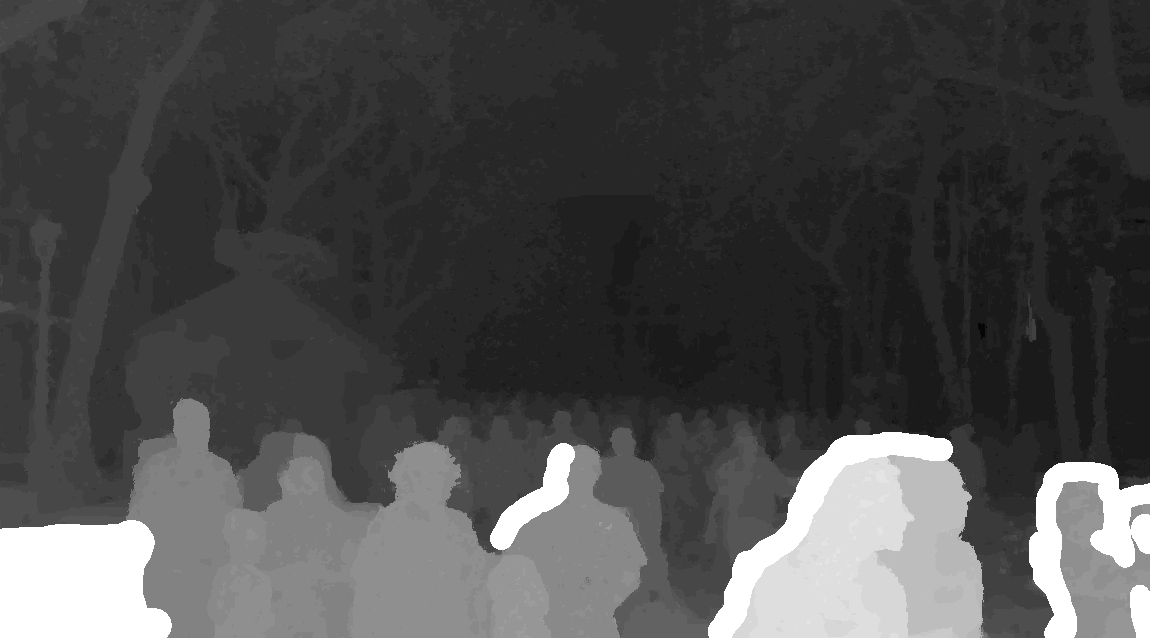
Depth map obtained by dmag6.
As promised, let's get rid of the artifacts coming from the rectification process by cropping the depth map and the reference image (left image).

Depth map obtained by dmag6 after cropping.

Reference image (left image) after cropping.
There are some areas in the foreground where the depth map is not that great. I am gonna use dmag4 to semi-automatically improve those areas. The input to dmag4 is the reference image which we obviously already have (that's the left image after cropping), the sparse/scribbled depth map, and the edge image.
To get the sparse/scribble depth map, you simply start with the cropped depth map and use the eraser tool (with anti-aliasing off, that is, hard edge on) to remove the areas you don't like, revealing the checkerboard pattern underneath. Of course, it's not the usual sparse/scribble depth map dmag4 usually takes for 2d to 3d conversion but it works just the same.
Input to dmag4 (sparse/scribbled depth map). The pure white areas are the areas that I erased. In gimp, they are transparent (checkerboard pattern) but blogger shows them as white.
To get the edge image, you simply trace the object boundaries in the areas that you erased in the sparse/scribbled depth map using the paths tool. The methodology in gimp is quite simple: create a path with the paths tool and then stroke it with anti-aliasing checked off and choosing a width of 1 pixel. Here, I use red for the color but you can use whatever color you want.

Input to dmag4 (edge image). What is shown as white in blogger is actually fully transparent (checkerboard pattern) in gimp.
Input to dmag4:
beta = 10
maxiter = 5000
scale_nbr = 1
con_level = 1
con_level2 = 1

Output from dmag4.
As you can see, dmag4 fills the areas that were erased without spilling over the segmentation in the edge image. Because an edge image is used, beta needs to be relatively low (10 is a good value).

Wiggle 3d gif created by wigglemaker.
Any questions? Feel free to email me using the email address in the "About Me" box.
Hi Ugo
ReplyDeleteNice picture of Las Ramblas, in Barcelona (Spain)
Extraordinary 3d effect
Thanks Pepe!
DeleteHey! i'm from Barcelona and this is amazing!! great job!!
ReplyDeleteI love how the window border moves within the wiggle 3d gif to provide greater depth.
ReplyDeleteThank you very much for your comment!
Delete