Here is the process:
1) Load (in Gimp) the reference image, typically, the left image of a stereo pair.
2) Load (as a layer) the depth map that needs to be edited.
3) Erase the input depth map in places where the depths do not appear to be correct.
4) If, for at least one area that's been erased, there is a depth discontinuity in the reference image, create a new layer and draw along the discontinuities using the pencil tool (size = 1 pixel). What you are doing is drawing a so-called "edge image".
4) Export the reference image as "content_image.png".
5) Export the partially erased input depth map as "sparse_depthmap_rgba_image.png".
6) Export the edge image as "edge_rgba_image.png". If there was no need to draw an edge image, then do nothing in this step.
7) Run the3dconverter2.
Here is an example:

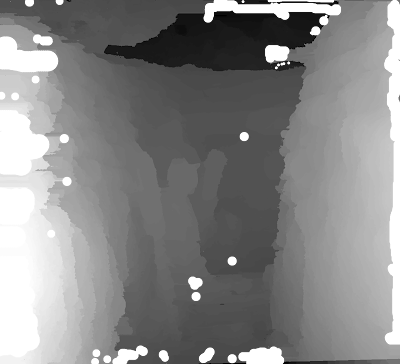
Partially erased depth map aka "sparse_depthmap_rgba_image.png". Pure white pixels are actually transparent.
Note that I could have done a much better job erasing stuff on the right side (upper right, to be precise) as I clearly missed a few pixels. No big deal but it's gonna show up in the output depth map. If you are a perfectionist, you should really erase them.
Here, I simply draw along what looks like a paddle since the paddle is clearly not at the same depth as the background. That's what I mean by depth discontinuity. You only need to draw within the confines of what's been erased in the input depth map, nothing more.
Remember those dark pixels I didn't erase on the right side (upper right) of the input depth map... I told you they would show up.
Here is a video tutorial that shows how the3dconverter2 can be used to edit depths maps:
Here is another video tutorial about the3dconverter2 but more in the context of 2d to 3d image conversion:


