Friday, June 26, 2015

Depth Map Automatic Generator 8 (DMAG8)

Depth Map Automatic Generator 8 (DMAG8) is a multi-view stereo automatic depth map generator. Its input is a set (any number) of non-rectified (non-aligned) images, typically extracted from a video taken with a single lens camera. In a nutshell, it's kinda like the Google Lens Blur smartphone app but more complicated. For more info on the DMAG8 internals, you're invited to check out Multi-View Stereo and Fast Bilateral-Space Stereo for Synthetic Defocus.

Because multi-view stereo relies on Structure from Motion (and Bundle Adjustment) which I haven't implemented yet, DMAG8 needs the output (the .nvm output file) of a third-party program called VisualSFM, which creates a sparse 3d reconstruction from a set of images. So, to be able to use DMAG8, you will need to install VisualSFM prior and run that on your set of images to get the .nvm file which contains the sparse 3d reconstruction (DMAG8 is actually only interested in the camera poses and the focal lengths). No worries as it's free. VisualSFM is quite cool on its own as it can also create dense 3d reconstruction via Yasutaka Furukawa's PMVS/CMVS tool chain.

Even if you can get a sparse 3d reconstruction from VisualSFM, it doesn't mean it's good enough for DMAG8. Depth Finder 8 (DF8) can assist you in determining if the nvm file is ok by drawing the epipolar line on the target image that corresponds to a given pixel in the reference image. By checking it against the matching pixel in the target image, one can tell if the sparse 3d reconstruction is good or bad. Of course, it doesn't have to be perfect but it may explain deficiencies in the depth map produced by DMAG8 (no use wasting time adjusting parameters then). Usually, when you are talking Structure from Motion (SfM) and that's what VisualSFM does, you want pictures (when paired together) taken with a rather wide baseline because, in that case, the 3d structure will be more accurate (although matching will be harder). So, if VisualSFM complains that it can't find a pair of images to initialize the 3d reconstruction process, it's usually because the baseline is not wide enough. No worries as you can always choose the initial pair yourself and VisualSFM can still produce the sparse 3d reconstruction.

The manual for DMAG8 (dmag8_manual.pdf) is in the directory where you decompressed ugosoft3d-8-x64.rar. It has a whole section on how to get the best of VisualSFM.

Update: Instead of using VisualSFM to get the camera positions and orientations (and the sparse reconstruction), use Structure from Motion 10 (SfM10). It's, in my opinion, much better and simpler to use.

The following is a sample depth map produced by DMAG8 using a set of two non-rectified images taken with a single lens camera. Doing multi-view stereo on a pair of images is not too exciting, but the key point here is that the two images are not aligned in any way and can't therefore be given to a classic stereo depth map generator.


Image 0 (reference image).


Image 1.


Sparse 3d reconstruction in VisualSFM.


Just for fun, this is the dense 3d reconstruction using Yasutaka Furukawa's CMVS tool within VisualSFM.


Depth map produced by DMAG8 using near plane depth = 0, far plane depth = 0, number of planes = 0, spatial sample rate = 8, range sample rate = 32, radius = 12, lambda = 0.01, max iterations = 1000, and hash table size = 10000.

The following is a sample depth map produced by DMAG8 using a set of three non-rectified images taken with a single lens camera.


Image 0.


Image 1.


Image 2.


Depth map produced by DMAG8 using near plane depth = 0, far plane depth = 0, number of planes = 0, spatial sample rate = 16, range sample rate = 16, radius = 12, lambda = 0.1, max iterations = 1000, and hash table size = 10000.

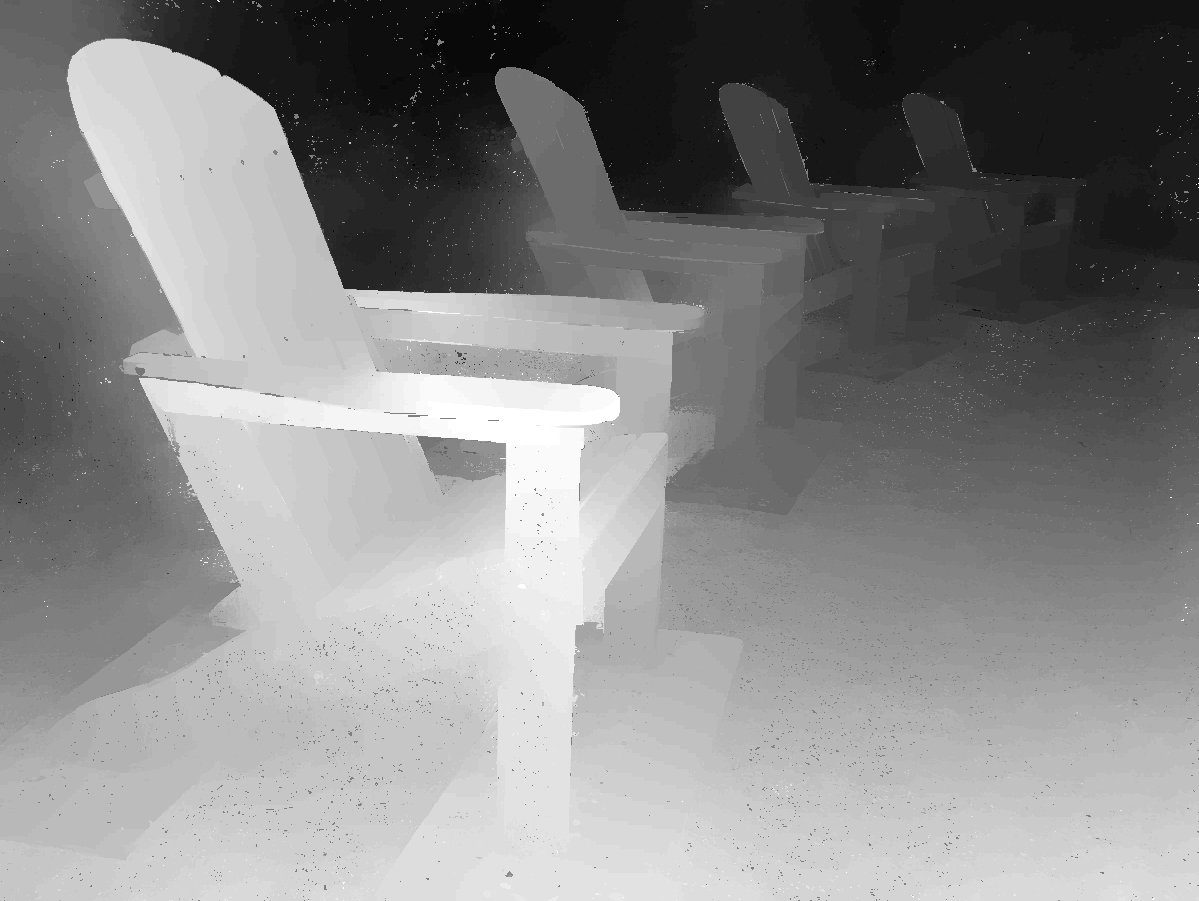
Here's another example of a depth map produced by DMAG8! This time I used a video shot with a single lens camera. Extracted 8 images from the video using ImageGrab which were then fed to VisualSFM to get the sparse 3d reconstruction (input to DMAG8):


Video and depth map produced by DMAG8 using near plane depth = 9, far plane depth = 80, number of planes = 0, spatial sample rate = 8, range sample rate = 32, radius = 12, lambda = 0.1, max iterations = 1000, and hash table size = 10000.

Although I haven't done it here, I strongly suggest using Edge Preserving Smoothing 7 (EPS7) to smooth out the depth maps produced by DMAG8.

The windows executable (guaranteed to be virus free) is available for free via the 3D Software Page.

Thursday, June 25, 2015

Camera Remover 8 (CR8)

Camera Remover 8 is used to remove cameras (images) from the so-called nvm file generated by VisualSFM. Sometimes, you may want a large number of images to generate a sparse 3d reconstruction but you don't need that many to generate a depth with Depth Map Automatic Generator 8 (DMAG8). The simplest way to accomplish that is to modify the nvm file and remove unwanted cameras. That's exactly what CR8 does.

The manual for CR8 (cr8_manual.pdf) is in the directory where you decompressed ugosoft3d-8-x64.rar.

The windows executable (guaranteed to be virus free) is available for free via the 3D Software Page.

Depth Finder 8 (DF8)

Depth Finder 8 (DF8) is meant to be used with Depth Map Automatic Generator 8 (DMAG8), which is an automatic depth map generator whose input is a set of non-rectified (non-aligned) images.

DF8 enables the user to fine tune the near and far plane depths needed by DMAG8. Given a pixel in the reference camera image (as determined by DMAG8) and a target camera image, DF8 draws the epipolar line on a copy of the target image. For things to be ok, the epipolar line should be near continuous and be crossing the matching pixel. If the (extended) epipolar line doesn't cross path with the matching pixel, the sparse 3d reconstruction from VisualSFM is not usable by DMAG8.

Although DMAG8 can compute the near and far plane depths of a 3d scene automatically, it is often necessary to set the near and/or far plane depth manually with DF8.

The manual for DF8 (df8_manual.pdf) is in the directory where you decompressed ugosoft3d-8-x64.rar.

The windows executable (guaranteed to be virus free) is available for free via the 3D Software Page.

Tuesday, June 23, 2015

Multi-View Stereo

Taking stereo pictures without a stereo camera is usually done with the cha-cha method (you shift the camera horizontally as best as possible after taking the first picture) or with a slide bar (enables you to slide camera along a straight line, hopefully horizontal). In any case, a little bit of alignment in Stereo PhotoMaker and you're in business. If you are planning to make a lenticular or wigglegram, then you are gonna need a depth map. For that, you need a depth map generator whose input is a pair of aligned or rectified images.

Now, what if you don't want to deal with all this stuff (being careful not to go out of alignment when you do the cha-cha) and want to use more than two images to get a depth map? Well, you are in luck because there is something called multi-view stereo. Usually, multi-view stereo is used in the context of 3d scene reconstruction. For instance, one can take hundreds of photographs of an object from as many viewpoints as possible and obtain a 3d version of the object (in the form of a point cloud which can then be post-processed to get a true 3d model). This is the poor man's 3d scanner. Here, I am only interested in getting the depth map, which makes it much easier although you still have to get the camera parameters for each image, in other words, the sparse reconstruction of the 3d scene (as opposed to dense). So, with multi-view stereo, you take a minimum of two images of an object from different view points (with different cameras even) and you can get a depth map, hopefully accurate. This of course assumes that the object as well the surroundings don't move. That's the downside of using a single-lens camera to do 3d.

If you are interested in multi-view stereo in the context of automatic depth map generation, you are invited to read this little article I wrote: Multi-View Stereo. This is the basis for Depth Map Automatic Generator 8 (DMAG8).

Monday, June 22, 2015

3D Photos - Adirondack deck chairs

This article attempts to demonstrate the effects of the parameters that Depth Map Automatic Generator 7 (DMAG7) uses to generate a depth map.


Left image.


Right image.

The stereo pair above is 1199x901. The min and max disparities are -50 and 4, respectively. The max L-BFGS iterations and hash table size are set at 1000 and 10000, respectively, and won't change during this experiment.

Let's see the effect of the patch radius on the depth map by varying the radius and keeping the other parameters constant (spatial sample rate = 8, range sample rate = 32, patch radius = ?, lambda = 0.1):


Patch radius = 2.


Patch radius = 4.


Patch radius = 7.


Patch radius = 12.

Winner: patch radius = 7.

Let's see the effect of lambda on the depth map by varying lambda and keeping the other parameters constant (spatial sample rate = 8, range sample rate = 32, patch radius = 7, lambda = ?):


Lambda = 0.01.


Lambda = 0.1.


Lambda = 1.

Winner: lambda = 0.01.

Let's see the effect of the spatial sample rate on the depth map by varying the spatial sample rate and keeping the other parameters constant (spatial sample rate = ?, range sample rate = 32, patch radius = 7, lambda = 0.01):


Spatial sample rate = 4.


Spatial sample rate = 8.


Spatial sample rate = 16.


Spatial sample rate = 32.

Winner: spatial sample rate = 8.

Let's see the effect of the range sample rate on the depth map by varying the range sample rate and keeping the other parameters constant (spatial sample rate = 8, range sample rate = ?, patch radius = 7, lambda = 0.01):


Range sample rate = 16.


Range sample rate = 32.


Range sample rate = 64.

Winner: range sample rate = 32.

I guess one could argue which depth map is really the winner at each stage. It's not that important as the intent was to show the effects of the various parameters on the depth map.

Saturday, June 20, 2015

Depth Map Automatic Generator 7 (DMAG7)

Depth Map Automatic Generator 7 (DMAG7) is an implementation of "Fast Bilateral-Space Stereo for Synthetic Defocus" by Jonathan T. Barron, Andrew Adams, YiChang Shih, and Carlos Hernández. It is a global method that uses a bilateral filter in the smoothing cost of the cost function. The cost function for which a gradient can be obtained analytically is minimized with L-BFGS.

If you'd rather read the Cliff notes rather than the paper itself, you are invited to go over Fast Bilateral-Space Stereo for Synthetic Defocus for a quick overview of the method and some pictures.

This is the first time I don't use Qt as a graphical interface (it's just too much of a hassle to deal with in windows, at least, for me). I am providing a batch file (dmag7.bat) to launch the executable from the directory the stereo pair resides on your computer. In this batch file, the path to dmag7.exe must be changed so that it is the correct path for your computer (depends on where you decompressed the archive). The input file dmag7_input.txt must also be copied onto that same directory (where the stereo pair is). It must be edited so that the names of the left and right images are correct. The various parameters in the input file are explained in dmag7_manual.pdf. Because I don't use Qt anymore, I had to write read/write routines for the main image format players. For now, the supported image file formats are: tiff, png, and jpeg.

Just to be clear, you copy dmag7.bat to where your stereo pair is, edit it so that the path is correct and double-click it to run DMAG7. You also need to copy the input file dmag7_input.txt to where your stereo pair is and edit it so that the image names are correct. The parameters that govern DMAG7's behavior can be changed by editing dmag7_input.txt. To edit a file, you can certainly use good ole "notepad" or whatever you are used to.

As always, if you have trouble with the software, send me your stereo pair and input file and I will take a look (but on my linux box). If the images are quite large, like more than 4 megapixels (which is not that large in the photography world), you may want to reduce the size just to make sure the program runs properly on your computer. Then, you can see about increasing the size but it may take a while depending on how much memory you have one board. You can monitor memory usage with windows task manager. If the memory used goes beyond your RAM memory limit and the virtual memory limit, the program will crash. If the memory goes beyond your RAM memory limit but stays below the virtual memory limit, the program will not crash but will be slow because it has to use the hard disk like it were memory (it's called paging). Ideally, you don't want paging to occur unless you don't need the computer for a while as it will be unusable until the program that's causing the paging either finishes or crashes.

The following shows a depth map produced by DMAG7 using min disparity = -50, max disparity = 4, spatial sample rate = 8, range spatial rate = 32, patch radius = 7, lambda = 0.01, max L-BFGS iterations = 1000, hash table size = 10000. The images are 1199x901.


"Adirondack chairs" stereo pair (left image).


"Adirondack chairs" stereo pair (right image).


"Adirondack chairs" stereo pair (depth map produced by DMAG7).

I haven't done so in the above example but I strongly suggest smoothing the depth map obtained by DMAG7 with Edge Preserving Smoothing 7 (EPS7).

The windows executable (guaranteed to be virus free) is available for free via the 3D Software Page.

Tuesday, June 16, 2015

Fast Bilateral-Space Stereo for Synthetic Defocus

I have written a little article in pdf form about Fast Bilateral-Space Stereo for Synthetic Defocus by Jonathan T. Barron, Andrew Adams, YiChang Shih, and Carlos Hernández. This paper describes a promising automatic depth map generator based on a global method that's using the bilateral filter as a smoothness term. I don't think that has ever been done before and it deserves talking about it (although I am sure academics will be over it soon). From what is written in the paper, the optimization method is also used in Google Lens Blur, the camera app, and we all know how good Google Lens Blur is (well, except me since I don't have a smart phone).

Anyways, here's the link: Fast Bilateral-Space Stereo by Ugo Capeto.

I have written my own implementation, Depth Map Automatic Generator 7 (DMAG7), which you are welcome to try.